Register for Apple Developer Program
A complete guide to registering for Apple Developer Program, including account type comparison, registration process, and FAQs
To publish your app on the App Store, the first step is to register for the Apple Developer Program. At ¥688 ($99) per year, this is an unavoidable investment for every iOS indie developer.
This article walks you through the differences between account types, what you need to prepare before registering, and the complete registration process.
Account Type Comparison
The Apple Developer Program offers three account types, each suited for different development scenarios:
| Feature | Individual | Organization | Enterprise |
|---|---|---|---|
| Annual Fee | ¥688 ($99) | ¥688 ($99) | ¥1,988 ($299) |
| App Store Distribution | ✅ | ✅ | ❌ (Internal distribution only) |
| Developer Name Display | Personal name | Organization/company name | Organization name |
| Team Member Management | ❌ | ✅ | ✅ |
| D-U-N-S Number | Not required | Required | Required |
| Review Timeline | Faster (usually within 48 hours) | Slower (requires organization verification) | Slower |
| Best For | Indie developers, individuals | Companies, studios | Large enterprise internal apps |
The Data Universal Numbering System is a unique nine-digit identifier assigned by Dun & Bradstreet to identify business entities worldwide. Apple requires organization and enterprise accounts to provide this number during registration to verify the legitimacy of the organization. It can be applied for free, but the review process typically takes 5-14 business days.
The indie developer's choice: If you're an individual developer, go with the Individual account. It has the simplest process, the fastest review, and all the features you need. The developer name displayed on the App Store will be your real name.
Pre-Registration Preparation
Prerequisites
Before starting the registration, make sure you have the following ready:
- Apple ID: If you don't have one yet, create one at appleid.apple.com. It's recommended to use your primary email, as all development-related notifications will be sent to this address.
- Two-Factor Authentication: Your Apple ID must have Two-Factor Authentication enabled. On your iPhone, go to Settings → Apple ID → Sign-In & Security → Two-Factor Authentication to enable it.
- Apple Device: The registration process requires identity verification on an iPhone or iPad, where you'll need to download the Apple Developer App.
Additional Requirements for Organization Accounts
If you're registering an organization account, you'll also need:
- D-U-N-S Number: Apply in advance on the Dun & Bradstreet website — the review takes 5-14 business days.
- Legal Entity Status: The registrant must be the legal representative or an authorized representative of the organization.
- Organization Information: Including registered address, legal representative name, contact details, etc.
Development Equipment Preparation
Registering a developer account is just the first step. iOS development also requires certain hardware and software tools.
Required Equipment
- Mac Computer — Xcode only runs on macOS, so this is a hard requirement. Apple Silicon (M-series chip) Macs are recommended for faster compilation speeds and native iOS simulator support. A MacBook Air with an M-series chip is sufficient for indie development; if budget is limited, consider a Mac mini.
- iPhone / iPad (Recommended but not required) — The simulator covers most debugging scenarios, but real device testing is irreplaceable for performance, sensors (camera/GPS/NFC), push notifications, and more. Even without a paid developer account, you can debug on a real device using a free Apple ID (though with limitations like 7-day re-signing — see the FAQ section below).
Development Tools
- Xcode — Apple's official IDE, free to download from the Mac App Store. It's quite large (around 12GB+), so be patient during the initial installation.
- Apple Developer App — Used for account registration, viewing WWDC videos, and documentation.
- TestFlight — Apple's beta distribution tool for inviting users to test your app.
Things to Keep in Mind
- macOS and Xcode versions should be kept up to date. Apple releases a new version of Xcode after WWDC each year, typically requiring one of the two most recent macOS major versions.
- Xcode updates are frequent and large — make sure to reserve enough disk space (at least 50GB or more).
- If your app involves hardware features (camera, Bluetooth, NFC, etc.), real device testing is essential.
- If you don't have a Mac, cloud Mac services (such as MacStadium, AWS EC2 Mac) are an alternative, though the experience isn't as good as a native device.
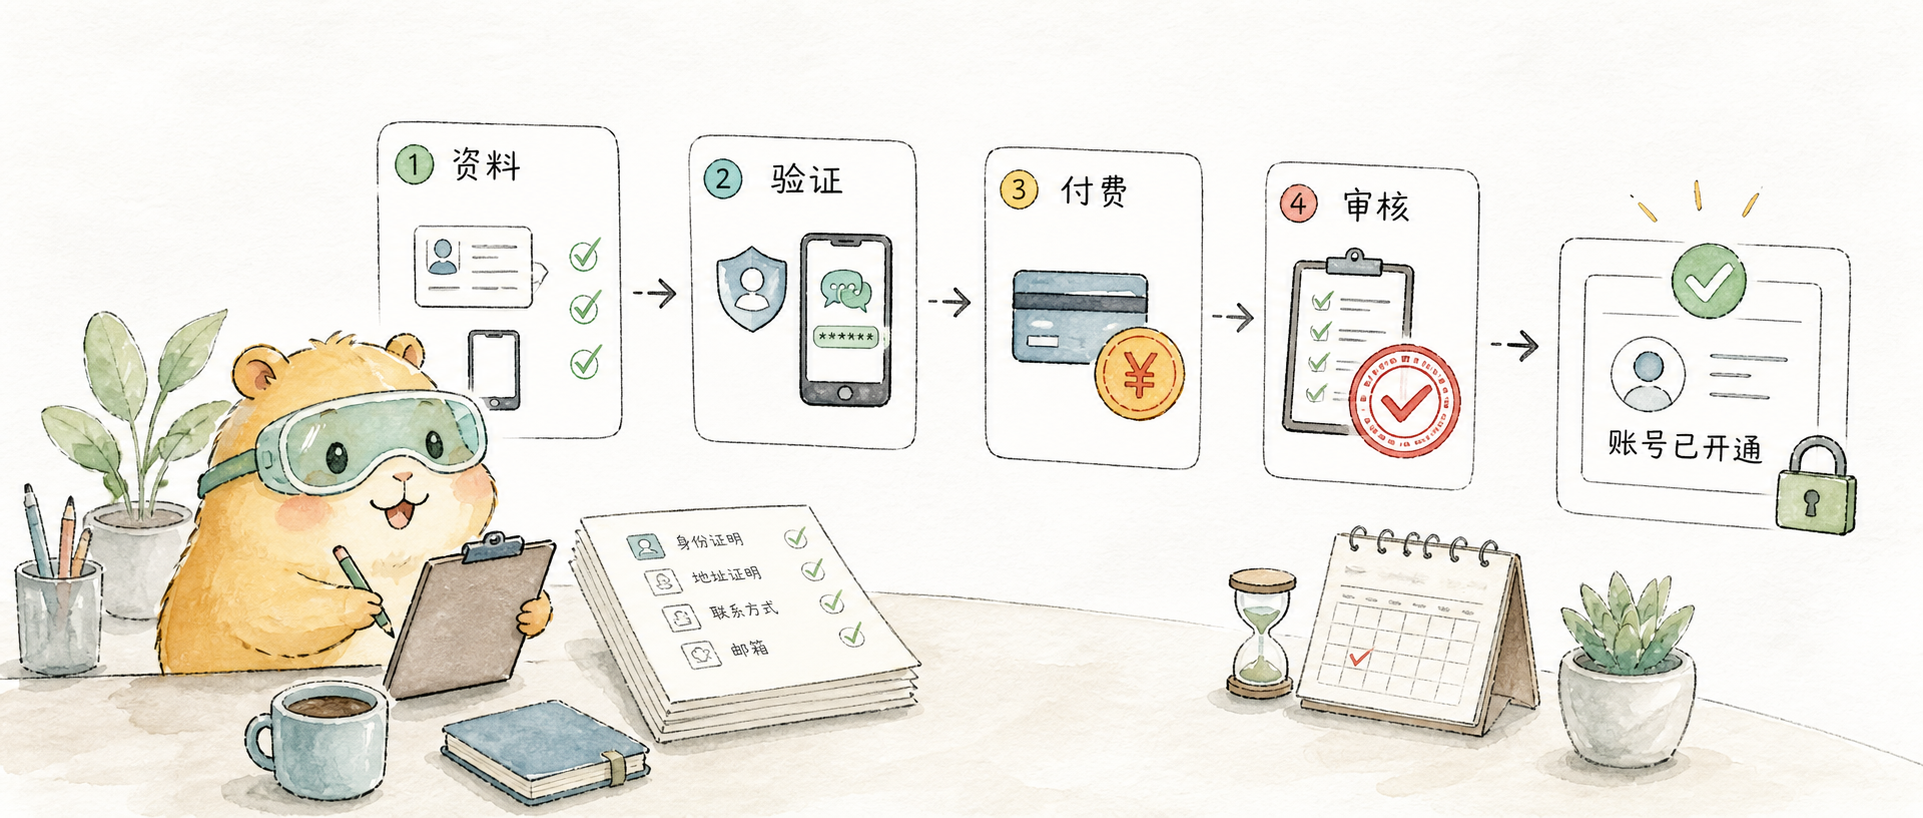
Registration Process
Step 1: Download the Apple Developer App
Open the App Store on your iPhone or iPad, search for "Apple Developer," and download it.
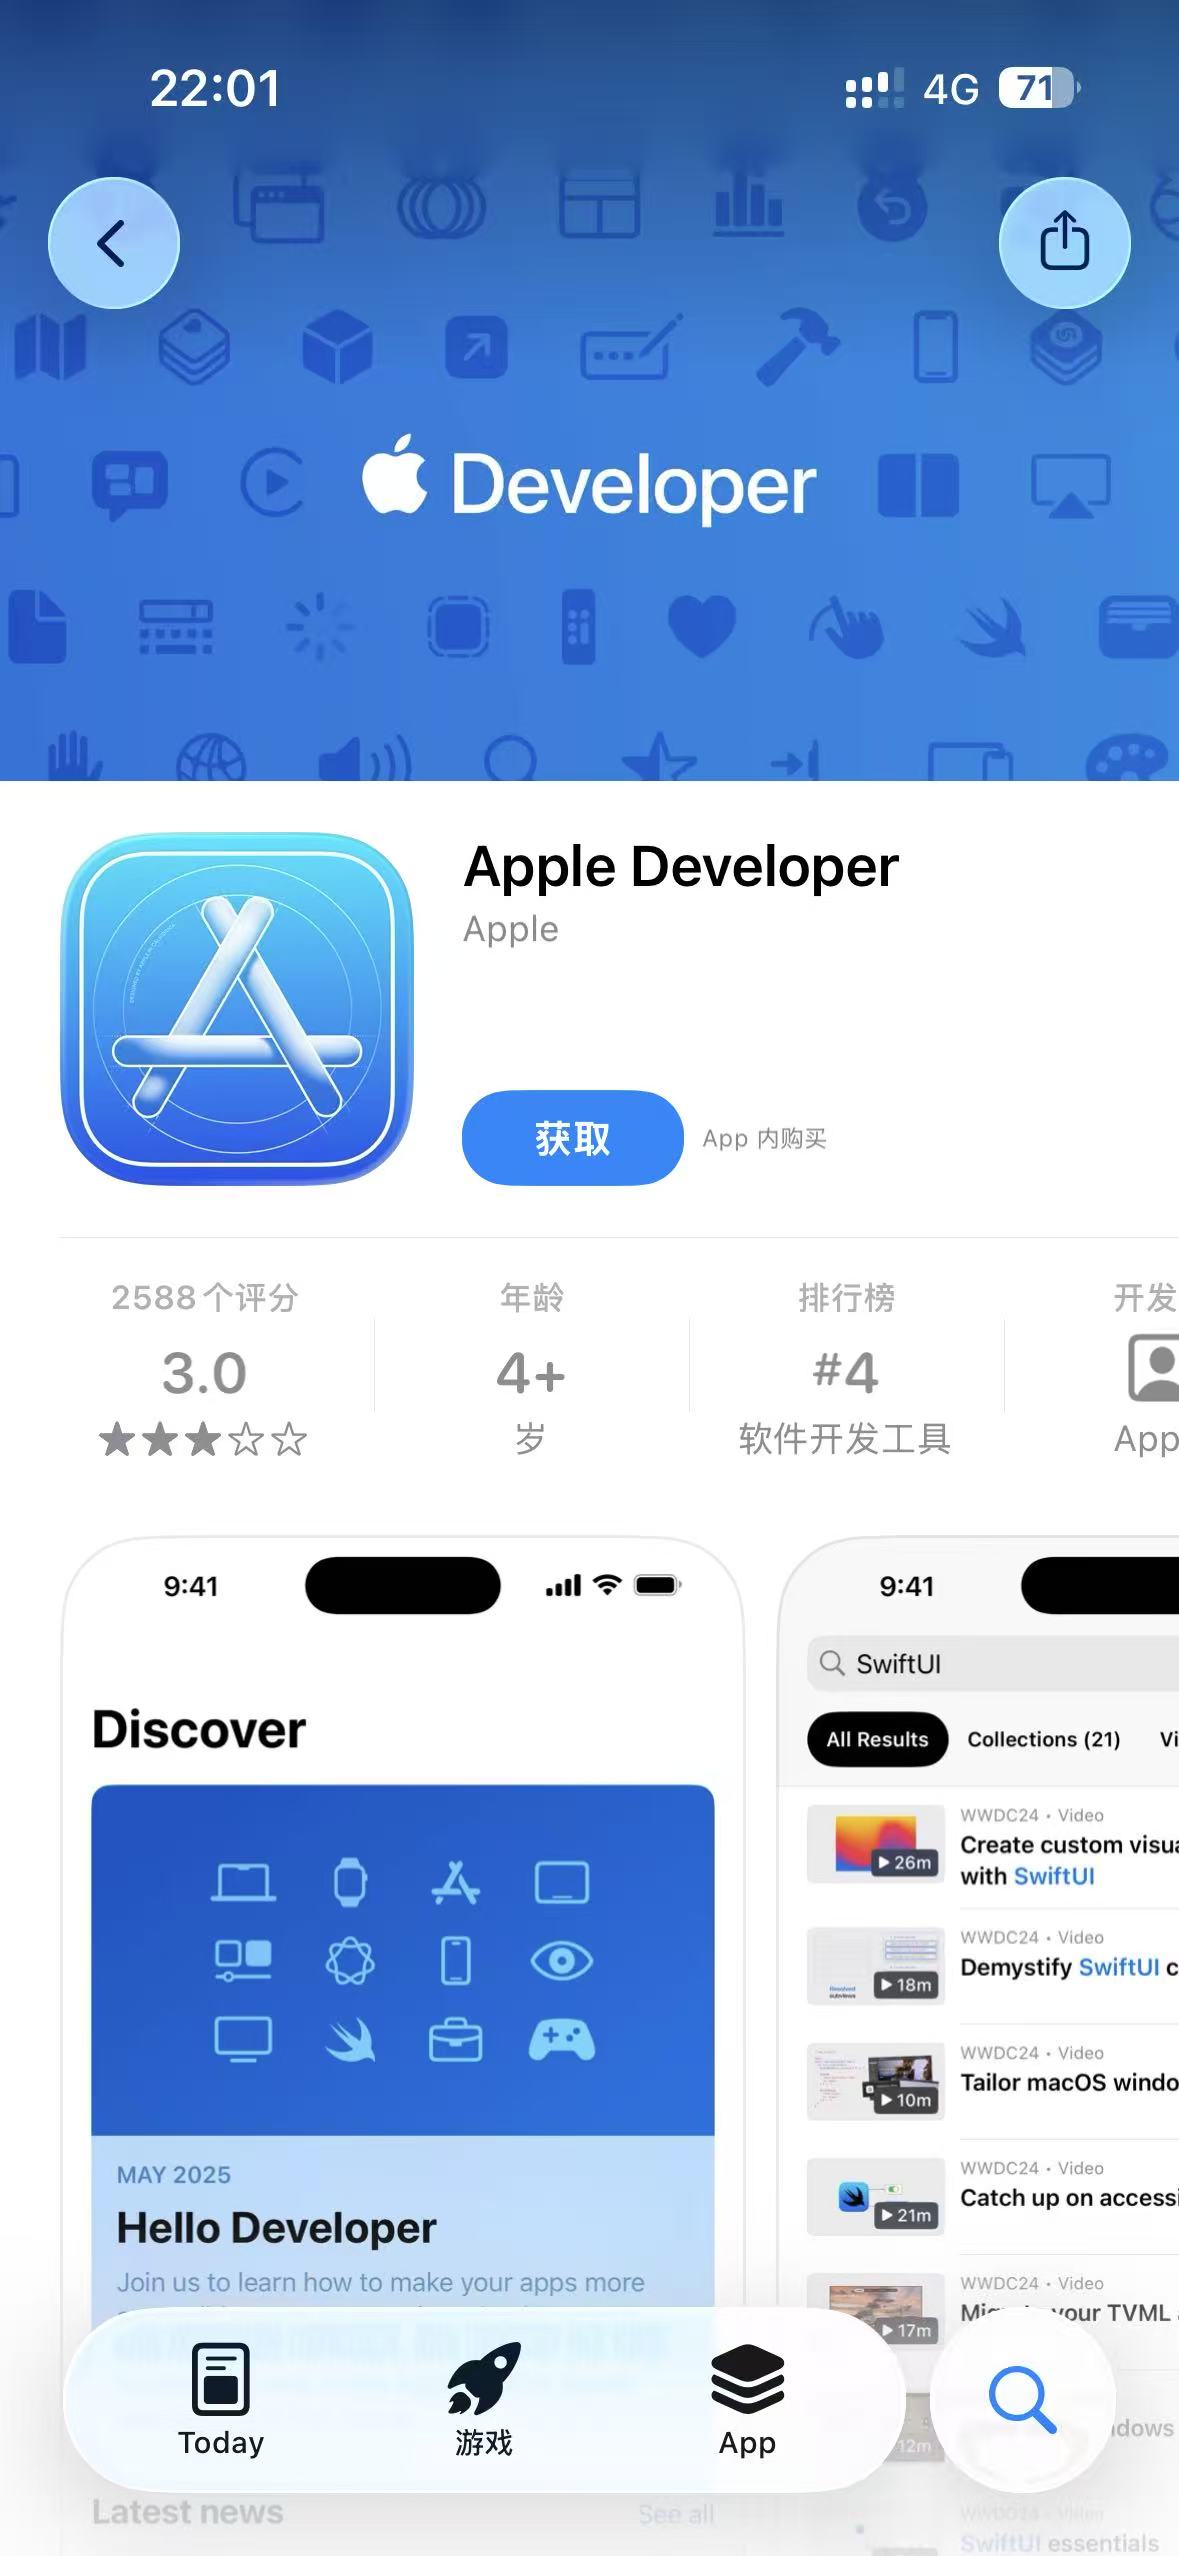
Step 2: Sign In and Start Registration
Open the Apple Developer App and sign in with your Apple ID. Tap the "Account" tab, then tap "Enroll in Apple Developer Program."
Step 3: Fill in Information and Verify Identity
Follow the prompts to fill in your personal information:
- Confirm Identity Information: Basic information such as name and address.
- Identity Verification: Depending on your region, the app may ask you to photograph a government-issued ID (passport, driver's license, etc.) or take a selfie for identity verification.
- Agree to Terms: Read and agree to the Apple Developer Program License Agreement.
The identity verification step should be done in a well-lit environment to ensure clear photos. The entire registration process must be completed on the same device.
Step 4: Pay the Annual Fee
After confirming your information is correct, pay the annual fee of ¥688 ($99). Payment methods linked to your Apple ID are supported. You'll receive a confirmation email after successful payment.
Step 5: Wait for Review

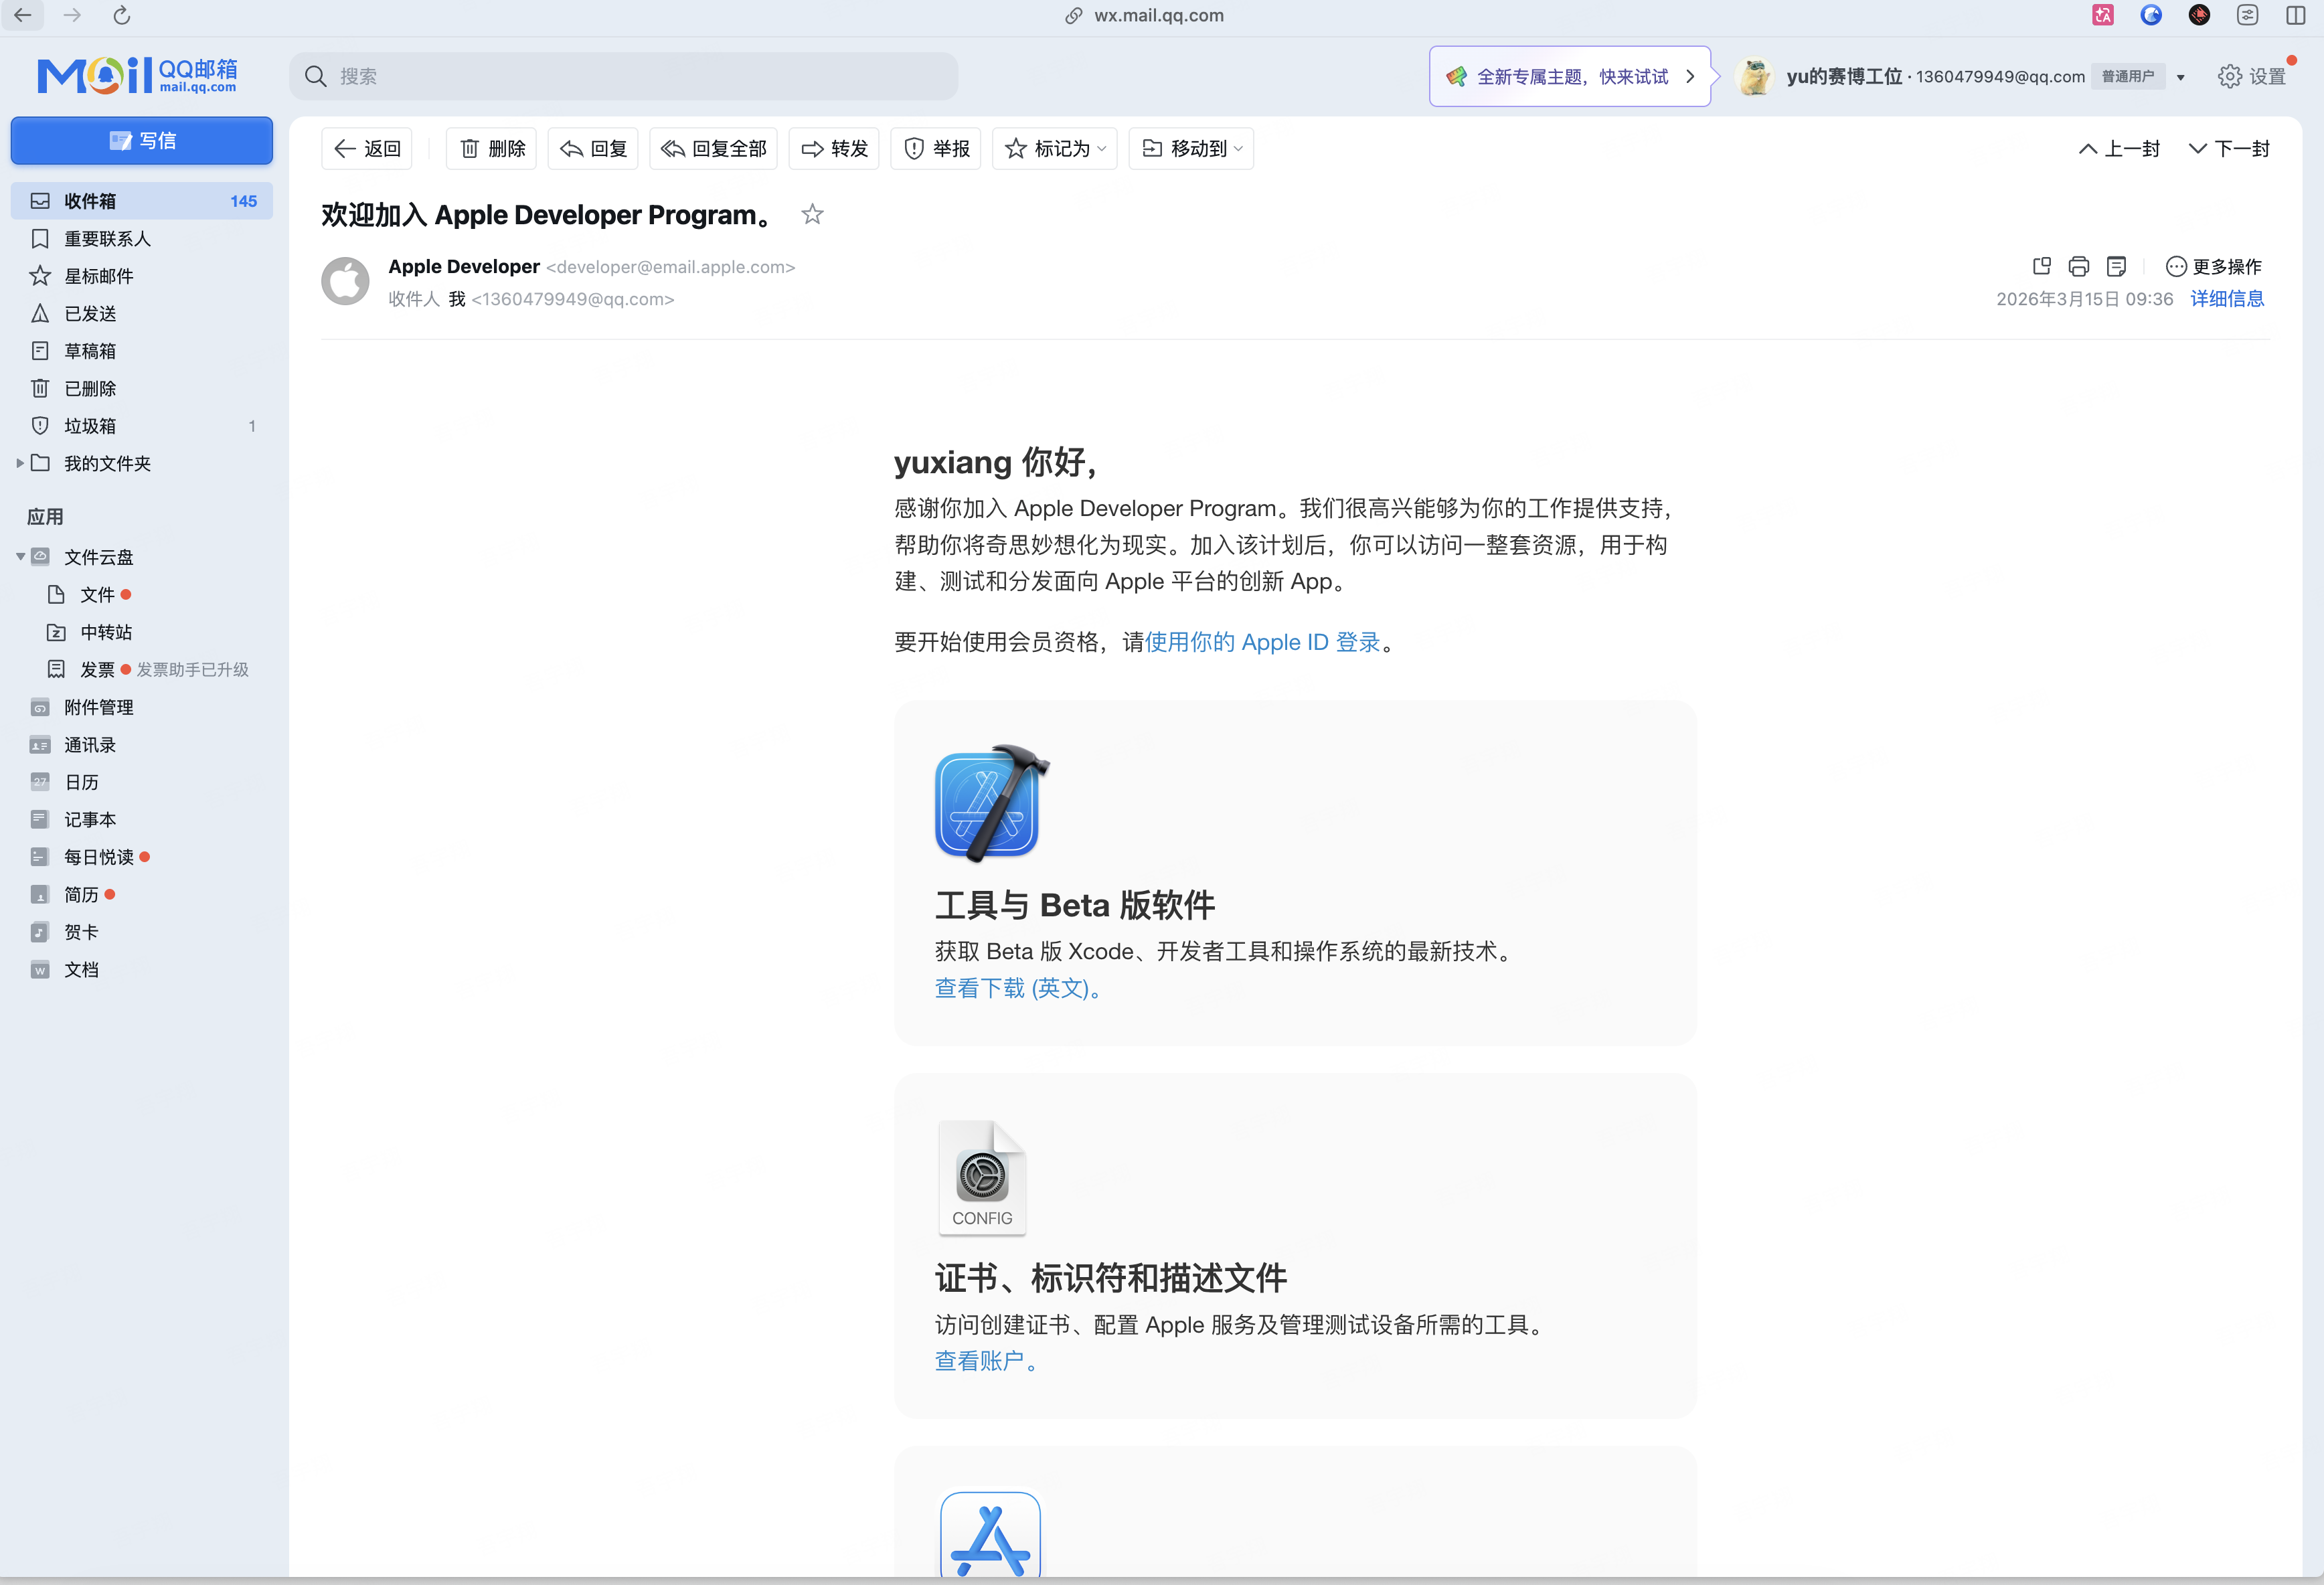
- Individual Account: Usually reviewed within 48 hours. I paid on March 14 and received the welcome email on the morning of March 15 — less than 24 hours in total.
- Organization Account: Apple will verify the organization's information and D-U-N-S number, which may take longer.
Once approved, you can log in to the developer dashboard at developer.apple.com and access all development resources.
Subscription Management and Renewal
The Apple Developer Program is an annual subscription, auto-renewing at ¥688 per year.

Auto-Renewal
Auto-renewal is enabled by default, and the fee will be charged from the payment method linked to your Apple ID before the expiration date. It's recommended to keep auto-renewal on to avoid account expiration affecting your published apps (see FAQ below for details).
Cancel or Manage Subscription
If you need to modify your renewal settings, open iPhone Settings → Apple ID → Subscriptions, find Apple Developer Program, and manage it there.
Frequently Asked Questions
Q: What happens if I forget to renew?
After your account expires, your apps will be removed from the App Store, but they won't be deleted. Once you pay again, your apps will be restored. However, user downloads and updates will be affected during the lapse, so it's recommended to keep auto-renewal enabled.
Q: How do I apply for a D-U-N-S Number?
Visit the link below, fill in your company information, and submit the application. The review typically takes 5-14 business days. Individual accounts do not need this number.
D-U-N-S Number Lookup
Look up your organization's D-U-N-S Number or request a new one for free.
Q: How do I contact Apple if I run into issues?
Visit Apple Developer Support, where you can reach out via online chat or phone. The China region supports Chinese-language service, and response times are quite reasonable.
Q: Can I start developing before registering?
You can start exploring, but be aware of the free account limitations. With a free Apple ID, you can write code in Xcode, debug using the simulator, and even install apps on your own device. This is perfectly adequate for learning Swift and validating basic UI ideas.
However, free accounts have notable limitations: apps installed on real devices need to be recompiled and reinstalled every 7 days, you're limited to 3 devices per platform, and features like push notifications, iCloud, TestFlight, and In-App Purchases are unavailable. If your app needs these capabilities, you'll need a paid membership during development — not just for publishing to the App Store.
Recommendation: If you're just getting started learning Swift and running demos, a free account works fine. Once you begin working on a real project, register for the paid membership as early as possible to avoid delays caused by feature restrictions.